Friday, January 3, 2014

The Heydeman Christmas Vacation

 We started our vacation by going to Nipomo, to spend Christmas at my sisters house. My family always seems to have a few Christmas' going on so we did a pre Christmas with my mom and then spent Christmas day with my dad.
 Greg and I got Troy his first Cabelas purchase... an ATV.
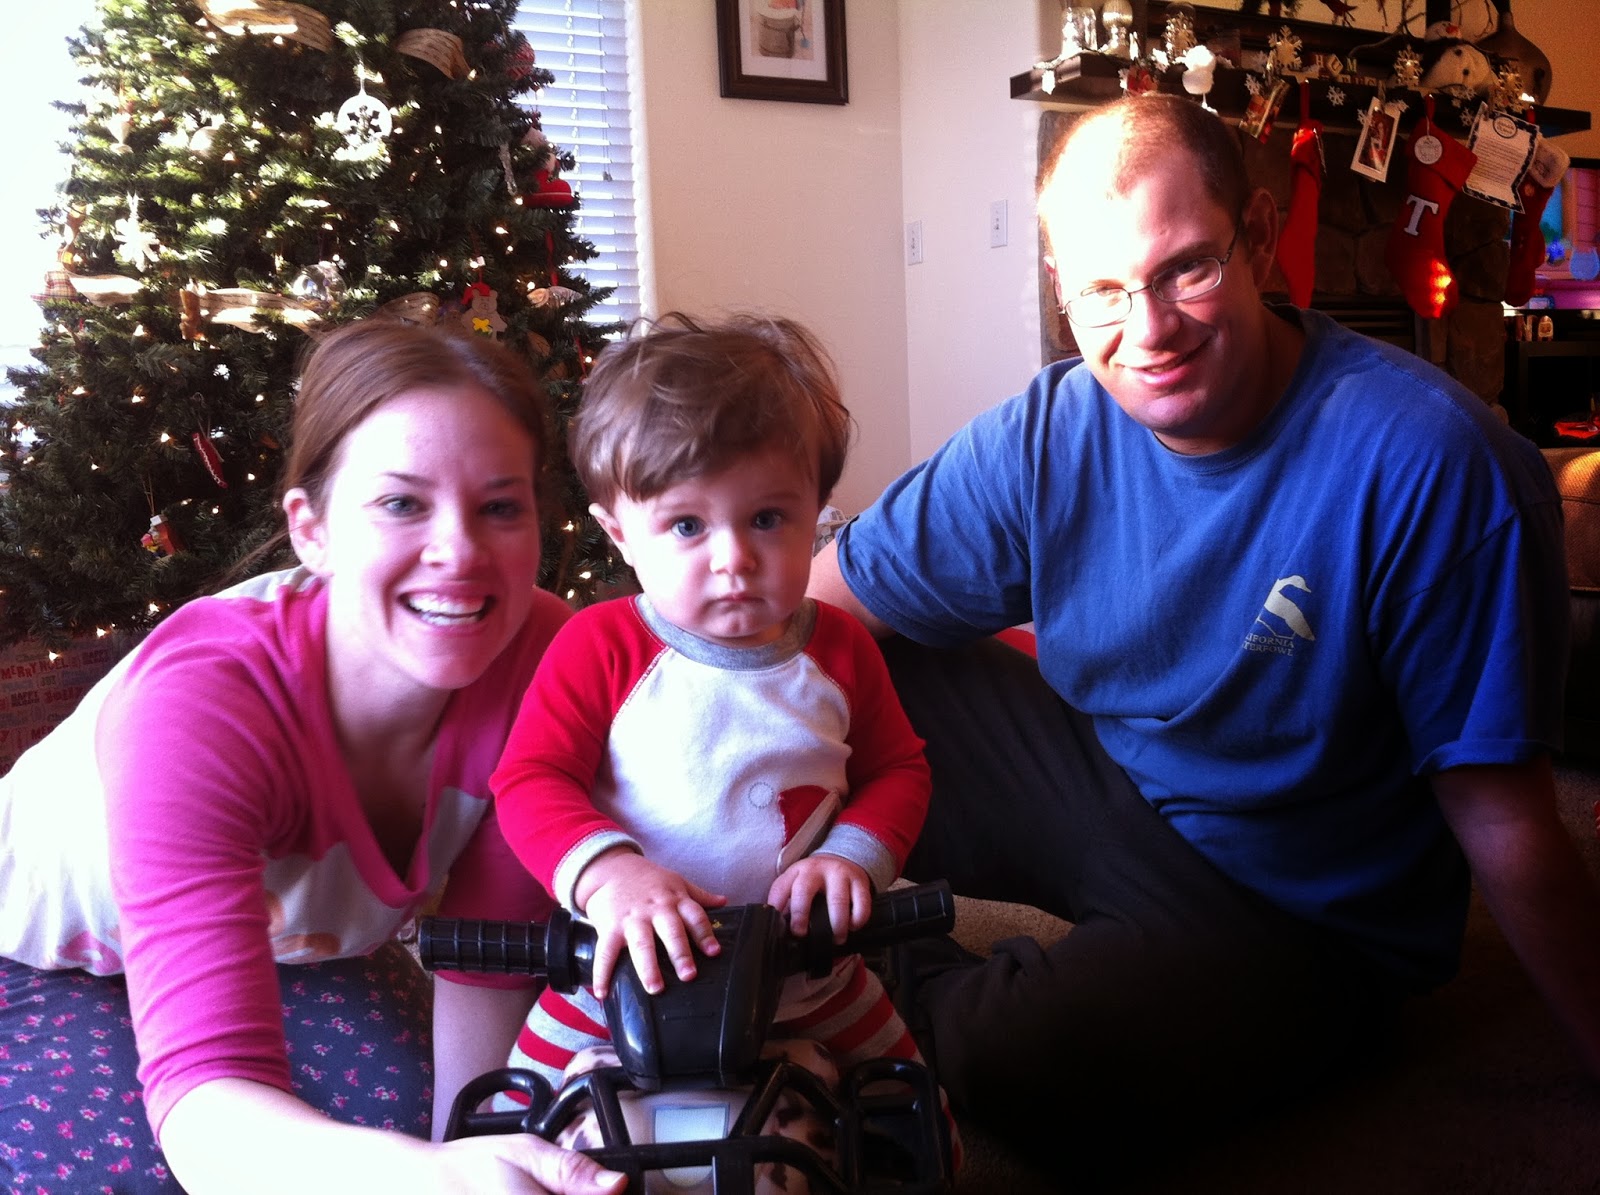
 can you stand that cute little face!


 Walking on the Avila pier.


  We got to go to the Avila barn to feed animals and buy some treats ... love this place!


Heather, Troy and I got to see the Monarch butterflies an the Pismo Dunes. So cool!


 It's crazy how it looks like leaves, but it's really clumps of butterflies.


 I love these two! It was hard for auntie to say good bye, but I'll see this cutie again for his First Birthday this weekend!


We spent New Years in Monterey with Greg's family- sorry I don't have more pictures! It's funny how you have your phone out a lot more when there is an adorable almost 1 year old crawling around! We can safely say that we were successful in getting the guys to play multiple games of the Ellen's Heads Up game though...it only took some cocktails. ;)


Happy 2014 ! I know we are hoping for a less stressful year , staying positive and thankful for what we  have are our goals!
Photobucket

I'm Dreaming of a white ... ceiling!

 
 Two weeks before Christmas we got 4 inches of snow in Redding... the cool part is it actually stuck around for a few days. We had fun in it and so did Bails!


Around the same time , I started a good inside activity... painting our ceiling white. The beams in our house are 70's beams- dark stained and our room had white washed cedar plank. It took us about a week and 4 coats (yes my back and shoulders were killing me), but we love how it turned out. It cleans up and modernizes the room and makes a big change for about $100 spent!
 

 Just a note if you have wood with knots you are painting you have to get a special paint to prime them or else they will show through even after 2 coats ;)


After we smooth our bedroom walls (we don't like their stucco texture) I'm going to paint them a steel blue  an this weekend I'm working on some wall art. Thanks to my sister who gave us a rug, my feet are enjoying the warmth.
Photobucket

DIY: Wall Art & Rope Mirror

My Mother in Law found this mirror at the Goodwill and asked if I wanted it (she always spots the good finds). Of course I said yes liking the size and shape, but I wasn't feeling the brass color.
 
I planned on using it in the TV room that will eventually have pretty new gray couches, so I spray painted it gray.
 
P.S. Goop off works great if you get some paint on a mirror ;)
I have been seeing rope mirrors on pinterest so I thought I would give it a try.
 

I went to Hope Depot and in the rope isle they will cut a piece to size- I think I got 5 yards and it was like 60 cents a yard. I tied the ends into a figure 8 knot ( easy diagrams on the internet).


I hot glued the rope on both sides. I will just use the rope as a faux hang and really hang it on the back- not sure how well the hot glue would hold.


I knew I wanted to create a focus wall behind the couch, so I bought some neat frames at Target and started working on some craft elements.
 
I downloaded a free template and made an embroidery ring (first ever attempt- so if you can't tell it's supposed to look like the rings of a tree).


 I painted a cardboard H gray and distressed it and how cool is it that Michaels sells burlap covered canvases - I just made a stencil on my silhouette and painted it gray. The print on the left says Life Happens I had to get it because it reminds me of my Papa and his saying ... which means pretty much the same thing, but you can't really post on your wall lol.
Photobucket

DIY: Mason Jar Light Fixtures

This was one of my first DIY projects for the house. I started it awhile a go and was waiting to post until they were on the wall...but, that wall is still in need of being finished so I thought I would go for it lol.


We had these two wall sconces on the wall where we took off our wood paneling in the living room. Greg and I had discussed taking the lighting out all together until I came across a pinterest post (of course) on mason jar sconces.  I saw some I loved at pottery barn, but even with my savored wedding gift cards I couldn't see spending $100 a piece on them!
 
For our sconces we had a white piece on the inside that screwed the glass shade into the light bulb holder. All I did was cut a whole in two mason jar lids big enough that the white piece would fit snuggly into it. I cut the hole by hammering a screw driver in the middle and then using sharp scissors. I then gorilla glued the white piece to the lid (it worked, but I forgot that gorilla glue foams up so it's a good thing the metal part covers it). 


 I spray painted all of the pieces with a stainless steel look alike spray paint and walah !
I can't wait to see them lit up with some old fashioned Edison bulbs inside.


Photobucket